
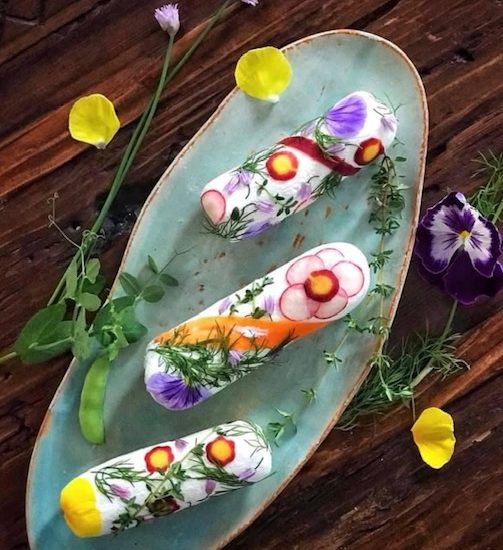
Spring is in the air and I’m ready for all things fresh and pretty! New flowers have just added to our local garden center and farmer’s market so I snatched some up to make a few pretty cheese logs to box up with some additional food and deliver to people who have been home for awhile as well as some for a fun celebration.
I was a little skeptical about eating flowers instead of just smelling them, but gave it a try and was super impresed with the different flavors.
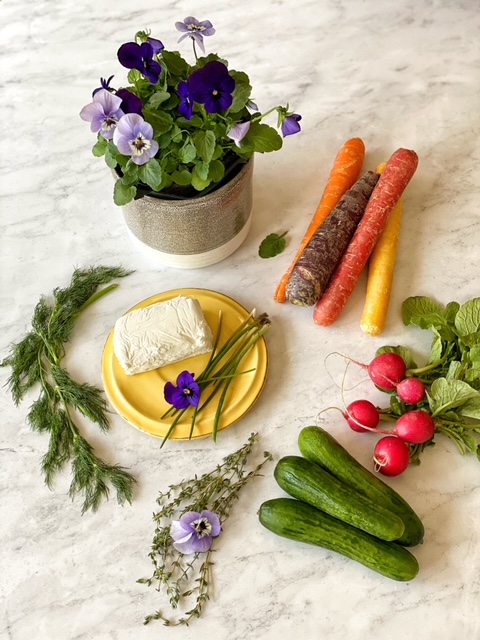
Grab some edible flowers, vegetables and cheese and give it a try for yourself!
How to make the Prettiest Cheese Logs: Step by Step
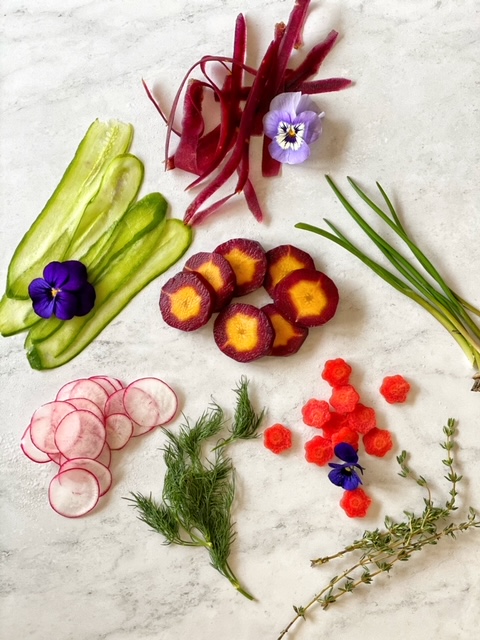
Step 1: Prepare the vegetables
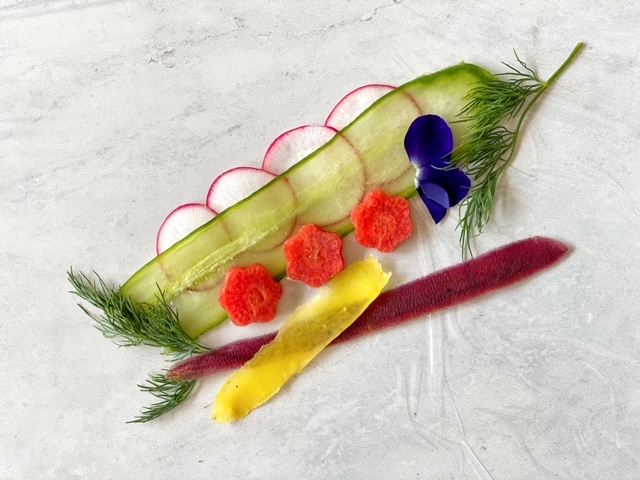
Slice the vegetables as thinly as possible, preferably using a mandoline. The mini cucumbers should be sliced into vertical ribbons, with the skin on. Carrots are made into strips and slices. Everything else is sliced into vertical circles. Use a mini flower cookie cutter to cut some vegetables into flowers.
Step 2: Prepare the flowers
Pull the petals off from the flowers and the leaves from the herbs. Make sure that the flowers are organically grown, without pesticides. If you’re unsure if they’re safe to eat, skip it! Below are a few edible flowers and how they taste.
Edible Flower Flavors
- Blue Borage: Cucumber freshness
- Chamomile: Slightly bitter, sweet and aromatic
- Chive Blossom: Chive taste
- Chrysanthemum: sweet + grassy
- Dandelion: sweet, honey-like
- Hibiscus: A fairly sweet, notes of citrus
- Lavender: Sweet floral with hints of citrus
- Lilacs: Floral and Fragrant with mild citrus notes
- Nasturtium: Peppery, spicy flavor similar to arugula
- Pansy|Viola|Violet: Slightly sweet or grassy
- Roses: Sweet subtle fruit undertones
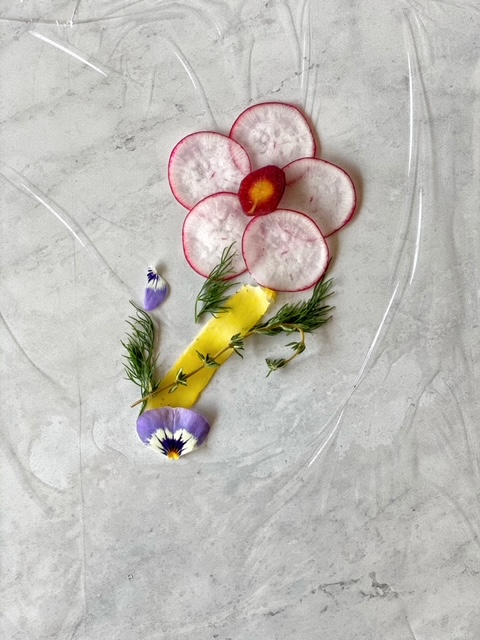
Step 3: Decorating your cheese log
Lay some plastic wrap on a smooth surface and arrange the vegetables and flowers. Remember that whatever is closest to the plastic will be on the outside of the cheese log.
Step 4: Prepare the cheese
Crumble the cheese in a bowl and take the amount you’ll like to use and form it into a log. You can make a large log or several mini logs!
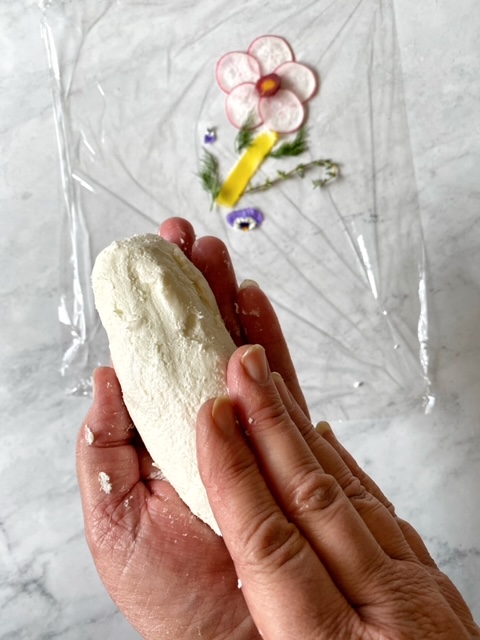
Step 5: Roll it up!
Place the cheese log on top of the design you created and roll it up in the plastic wrap. Refrigerate until ready to serve.

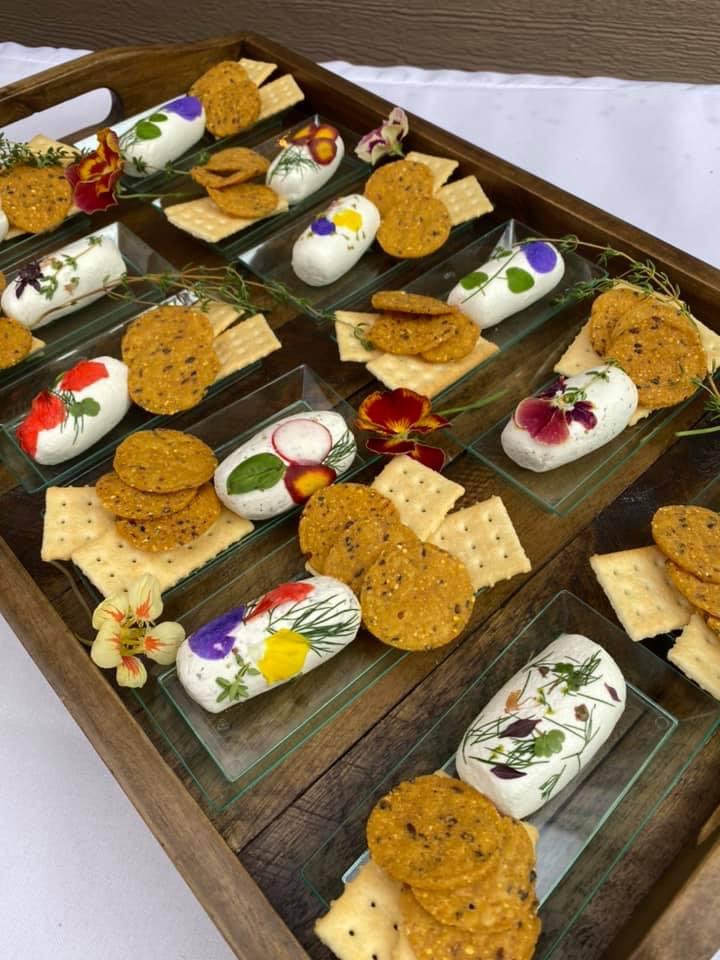
Step 6: Serve
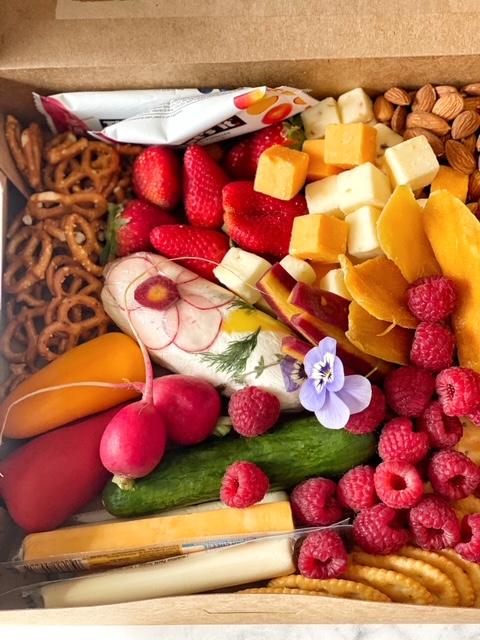
Serve mini cheese logs individually with crackers. Medium logs can be added to a charcuterie box to bring along for a picnic or drop off at your neighbor’s house. Large logs can be served on a platter at a meal or buffet.
I hope you’ll have as much fun making these as I did. Get your kids involved too and I’ll bet they’ll eat their vegetables!
Prettiest Flower and Vegetable Cheese Logs

The prettiest cheese logs you’ll ever make! Learn how quick and easy it is to pull
together these cheese logs. Add to a charcuterie tray or dig right in with some
crackers. You’ll make these over and over and your guests will think you spent
hours making them!
- Tricolor Carrots
- Radishes
- Mini Cucumbers
- Edible Flowers
- Fresh Herbs (Dill, Parsley, Chives, Oregano, Cilantro)
Slice the vegetables as thinly as possible, preferably
using a mandoline. The mini cucumbers should be sliced into vertical ribbons,
with the skin on. The carrots are sliced into ribbons and circles. Everything else is sliced into vertical circles. Use a mini flower cookie cutter to cut some vegetables into flowers.Pull the petals off from the flowers and the leaves
from the herbs.Lay some plastic wrap on a smooth surface and arrange the vegetables and flowers. Remember whatever is closest to the plastic will be on the outside of the cheese
log.Crumble the cheese in a bowl and take the amount you’ll like to use and
form it into a log.Place the cheese log on top of the design you created and roll it up in the plastic
wrap. Refrigerate until ready to serve.