
I’m one who likes to celebrate every holiday before jumping to the next one (yes, there’s a but coming) BUT this homemade gift takes a little patience and time before it’s ready to use and with only 2 ingredients, it takes very little effort to assemble.
Vanilla is my absolute favorite spice in the world. I use the amount listed in recipes merely as a guideline and then always add more. Pure vanilla can be a little expensive…second only to saffron. The vanilla beans come from a beautiful orchid that blooms once a year. After they’re hand pollinated, harvested by hand and cured for several months, the beans are ready. Since most recipes call for 1 teaspoon of vanilla, I don’t mind buying top-quality. Most people think that vanilla is, well…vanilla! There are 3 different types of vanilla beans and each has a unique and different flavor profile.
- Madagascar-70-80% of the world’s vanilla comes from the islands of Madagascar and neighboring tropical areas along the Indian Ocean and is considered the Gold Standard of vanilla. Madagascar beans have a rich, dark and sweet flavor and are the thinnest bean of the 3 different types.
- Tahitian – This bean is all about the aroma! It’s the thickest and darkest bean of the 3 types and is almost black in color with more floral, fruity, cherry-chocolate flavors.
- Mexican- This bean is thicker and smooth with a rich, spicy aroma and is a favorite of many! Some manufactures of Mexican vanilla may add Tonka Bean which contains coumarin, and is banned by the FDA as it may cause damage to your liver and kidneys. If you’ve traveled to Mexico and bought some super cheap vanilla, it’s probably flavored with Tonka Bean. Throw it out and be sure to buy from a reputable supplier.
When using the vanilla bean seeds to bake or cook, look for beans that are shiny and black, tender, plump and moist, preferably with the white powder of vanillin on them. Don’t waste your money on the hard, dry and shriveled up beans because they aren’t the freshest or most flavorful. When making vanilla, go ahead and buy the grade B beans, as those are the perfect ones for the extract.
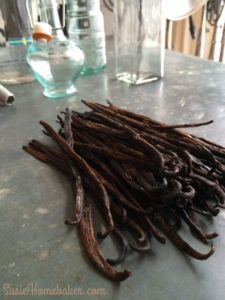
I ordered a large amount of vanilla beans online and shared them with a couple of friends who were also interested in making vanilla. Shop around to get the best deal. For a smaller quantity, check out Costco. If you’d like to create your own ‘signature vanilla’, mix a couple different beans together. How about some Tahitian beans and Mexican or Madagascar? Whoa!
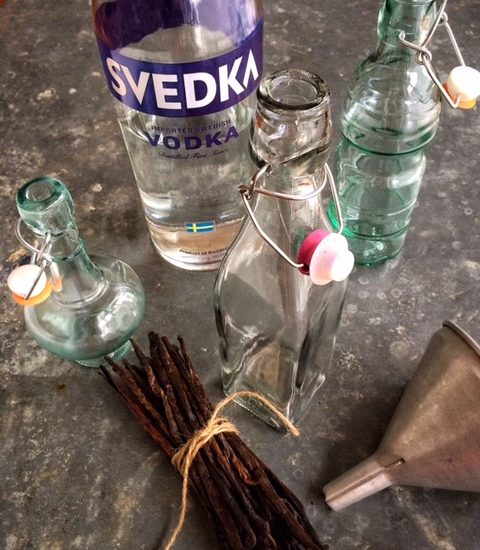
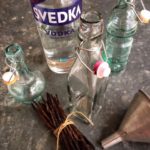
I found a nice variety of bottles at TJMaxx, Homegoods and The Container Store. I like having a variety of shapes and sizes to make the vanilla and found the taller bottles tend to work better. If you find some shorter bottles that you fall in love with, cut the beans to fit your bottle.
Do your own taste test to see which you prefer. Which is your favorite and why?
DIY Homemade Vanilla
From orchid to bean to liquid deliciousness, there’s nothing ordinary about a fresh batch of homemade vanilla.
- 7 Vanilla Beans
- Vodka (Rum or Bourbon to cover the beans (I prefer Vodka for a stronger vanilla taste))
- Wash the bottles in hot soapy water. Rinse well and allow them to air dry.
- Using a sharp knife, slice the bean lengthwise, leaving the end intact.
- Add the beans to the bottle
- Pour the alcohol over the beans, making sure that the beans are submerged.
- Store at room temperature in a dark place, shaking the bottles once a week. The vanilla will be ready in about 8-12 weeks. You can remove the beans or leave them in the bottle for a more flavorful vanilla. Present your bottles by adding a label, tag, ribbon or twine. Get creative!
Note: Some people add additional alcohol once the volume falls, but I don’t recommend that as I don’t want the vanilla diluted.